Blackjack phones

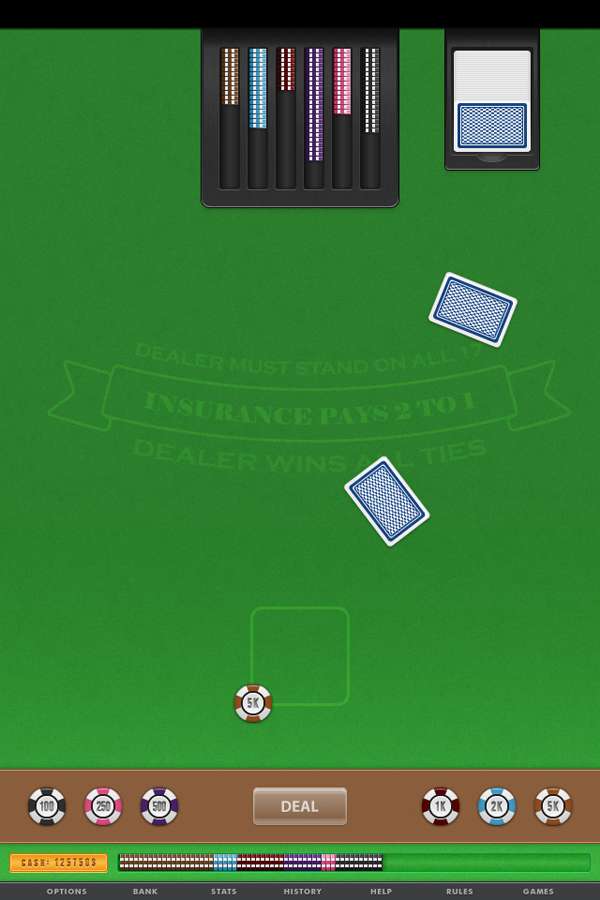 In the following tutorial you will learn how to create a mobile phone blackjack app interface. This tutorial uses many different vector techniques including the Appearance Panel, Transparency Settings, Patterns and more. This is an advanced tutorial that people of an intermediate skill level will find to be a challenge, but also very rewarding. Let's begin!
Step 1
Hit Control + N to create a new document. Enter 640 in the width box and 960 in the height box then click on the Advanced button. Select RGB, Screen (72ppi) and make sure that the "Align New Objects to Pixel Grid" box is unchecked before your click OK. Now, turn on the Grid (View > Grid) and the Snap to Grid (View > Snap to Grid). Next, you'll need a grid every 10px. Go to Edit > Preferences > Guides & Grid, enter 10 in the Gridline every box and 1 in the Subdivisions box.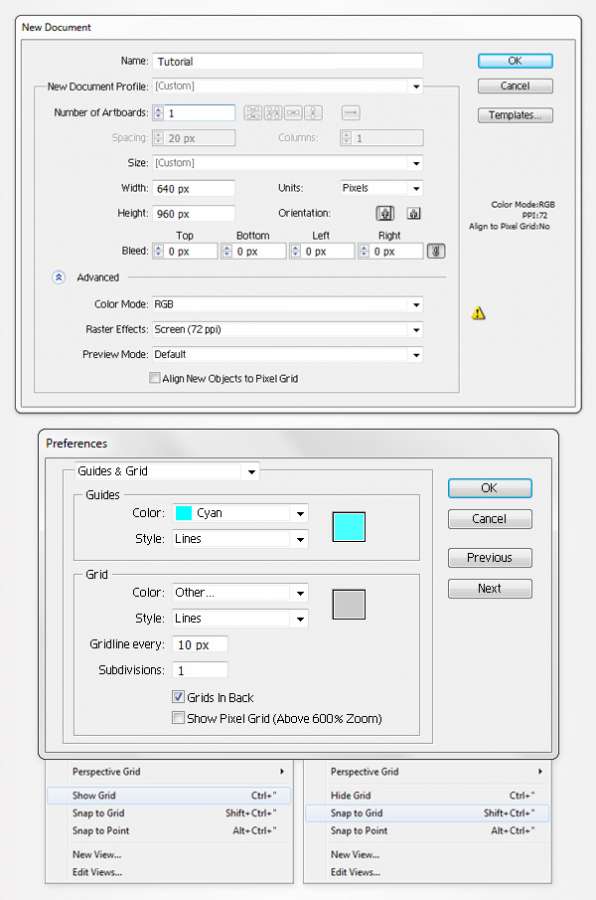 You can also open the Info panel (Window > Info) for a live preview with the size and position of your shapes. Do not forget to set the unit of measurement to pixels from Edit > Preferences > Unit > General. Al these options will significantly increase your work speed.
Step 2
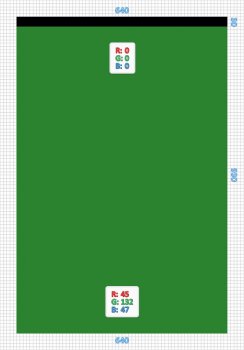
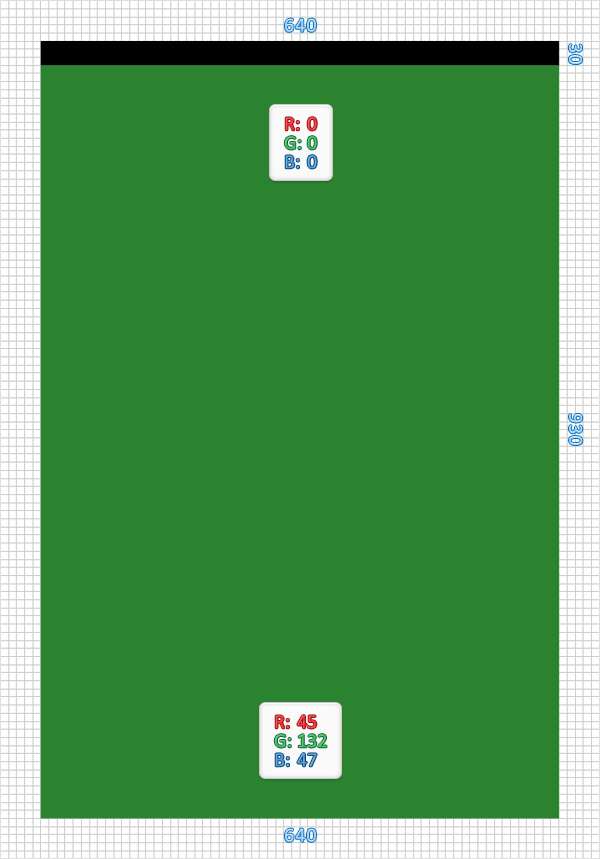
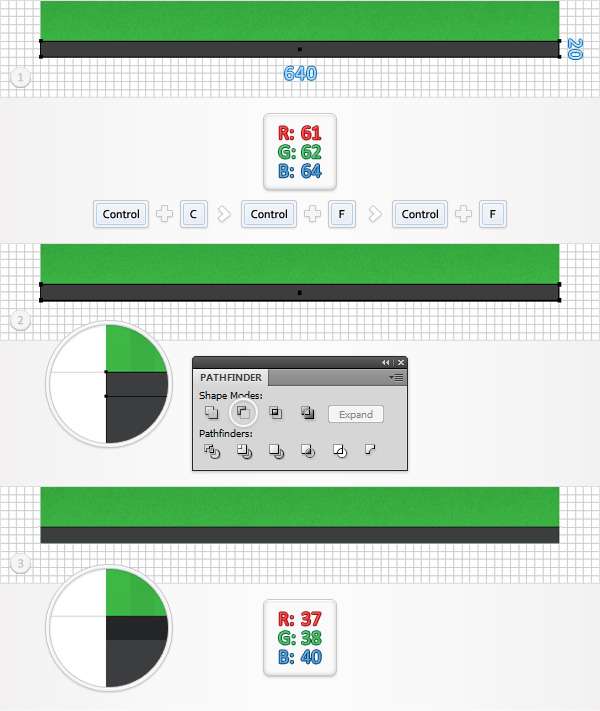
Pick the Rectangle Tool (M), create a 640 by 30px shape, fill it with black and place it in the top of your artboard. Continue with the Rectangle Tool (M), create a 640 by 930px shape, fill it with R=45 G=132 B=47 and place it below the black rectangle, as shown in the following image.
 Step 3
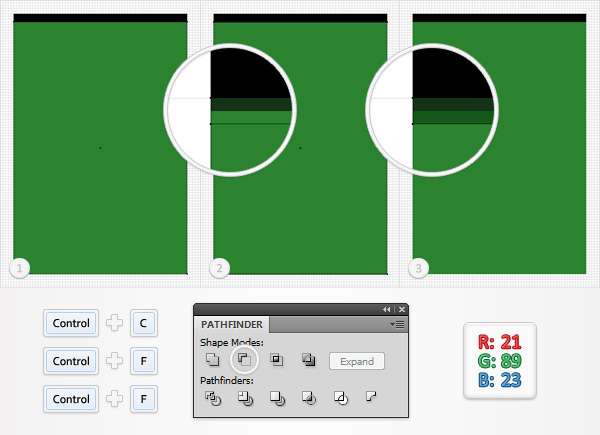
Disable the Snap to Grid (View > Snap to Grid) then go to Edit > Preferences > General and make sure that the Keyboard Increment is set at 1px. Select your green rectangle and make two copies in front (Control + C > Control + F > Control + F). Select the top copy and hit the down arrow once to move it 1px down. Reselect both copies, open the Pathfinder panel and click on the Minus Front button. Fill the resulting shape with R=21 G=51 B=23.
Step 4
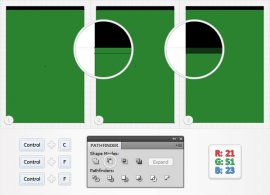
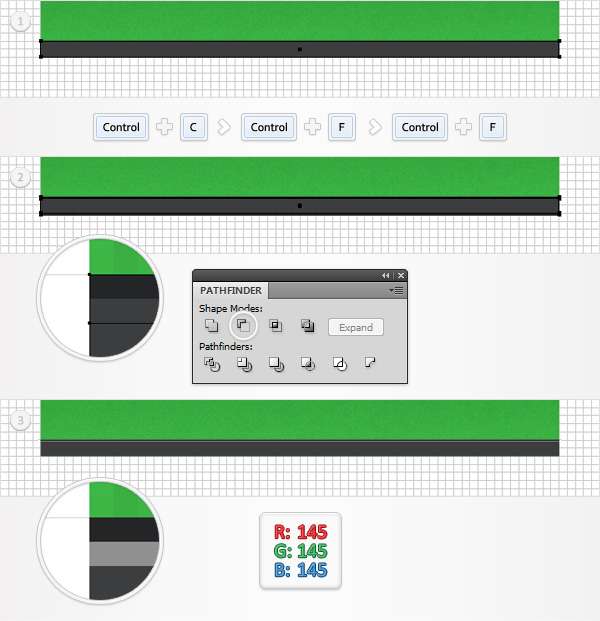
Reselect your green rectangle and make two new copies in front (Control + C > Control + F > Control + F). Select the top copy and move it 2px down. Reselect both copies and click on the Minus Front button from the Pathfinder panel . Fill the resulting shape with R=21 G=89 B=23.
 Step 5

Reselect your green rectangle, focus on the Appearance panel and add a second fill using the Add New Fill button. It's the little white square icon from the bottom of the Appearance panel. Select this new fill from the Appearance panel, lower its opacity to 50%, change the blending mode to Overlay and add the linear gradient shown in the following image. The yellow zero from the gradient image stands for opacity percentage.
Make sure that your green rectangle is still selected, keep focusing on the Appearance panel, add a third fill and select it. Make it black, lower its opacity to 8%, change the blending mode to Multiply and go to Effect > Artistic > Film Grain. Enter the properties shown below and click OK.
Finally, add a fourth fill for your green rectangle. Select it, make it white, lower its opacity to 10%, change the blending mode to Multiply and go to Effect > Artistic > Sponge. Enter the properties shown in the following image and click OK.
- 9 masks of fire caça-níquel online
Gangs have divided Chicago in 2-- the northside is run by the Bertshce mob, the southside by the Viale brothers, Augie & Vito. The line of demarcation being Madison Street. At the news office, Jake Lingle phones in a story to the front desk: gang war has erupted on the near northside, 2 hoods with machine guns smashed the liquor supply at...